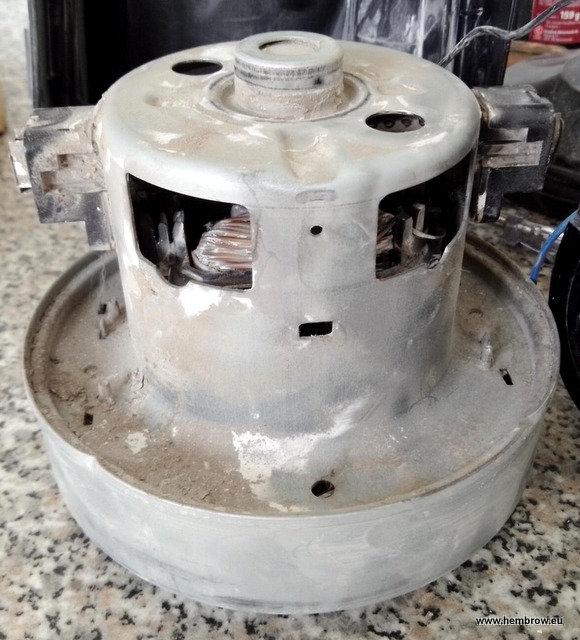
A few days ago our vacuum cleaner stopped working. What actually happened is that it made a rather unpleasant burning electronics smell, accompanied by a significant reduction in suction. I took it apart, and the first thing that was required was a good clean. Clearly the dust which went into this vacuum cleaner did not all end up being collected, but was instead swirling around all the internal parts because there were so many leaks. So the first thing I did was take everything into the garden for a wash.

By connecting the mains electricity directly to the motor instead of running it through the electronic speed controller I could confirm that it was indeed the motor itself which was faulty. The motor is combined with an impeller and put together without any easily removable fasteners. They are not separable or easily maintainable. The bearing seemed to be fine, but it was obvious that the coils had become rather hot and that the insulation on them was no working properly

A direct replacement motor is available from Samsung, but this costs about €90. On the other hand a generic replacement motor with the same dimensions (130 mm diameter, 110 mm height), described as suitable for Samsung / Dyson / AEG and other makes, cost only €30. So that's what I ordered as a replacement. Note that this suggests that all these vacuum cleaners have essentially the same parts inside apart from the plastic mouldings around the motor.
 |
| Label on the generic replacement motor. Little information other than diameter, height and wattage. |
The generic motor was the same size, but not identical in all ways. In particular, the two holes on the top of the motor must line up with two plastic studs inside the plastic housing which hold in place a piece of rubber which absorbs shock and stops the motor from rotating:


This, of course could be fixed. I cut off the plastic studs, drilled holes in the correct place for the replacement motor and glued some wooden dowels into place with epoxy:

Another small issue was the power connectors were a different place on the replacement motor and the housing didn't provide space for them. I found that they could be bent slightly to fit and then I had to solder wire directly to the terminals instead of using push-on connectors. The parts could then be re-assembled.
While looking for information about these vacuum cleaners I came across an interesting blog from someone who had eliminated the leaks. While re-assembling I followed his suggestions in the hope that this would improve performance.
Result: Our vacuum cleaner now works perfectly again
It's as good as new. Actually it's better than new in three ways:
- It sucks better than ever
- It is much quieter than it used to be
- It uses uses less electricity than before
The replacement motor is rated at 1200 W instead of the 2000 W originally fitted so power consumption is lower (this obviously depends on the power setting), but it's sucking better because sealing the leaks means that less of the effort put in by the motor is wasted. Meanwhile, getting rid of the leaks also means that most of the wind noise that the machine made has now gone away.
